





In this blogpost:
Setting Up a Cold Plunge Chiller Without Guesswork
Learn how to set up a cold plunge chiller with safe placement, water flow, filter care, drainage checks, and first-use tips for a smoother home routine.
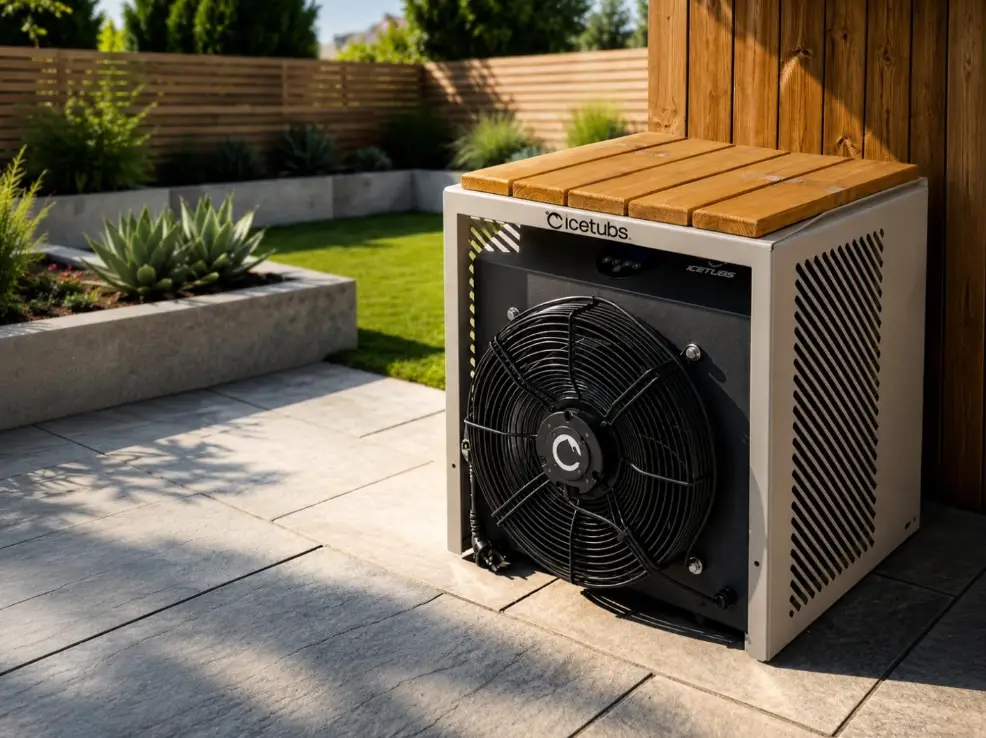
A cold plunge chiller can change the whole routine.
Instead of buying ice, waiting for the water to cool, and checking the temperature by hand, a chiller helps keep the water ready. The practice becomes less about preparation and more about showing up.
But the chiller still needs the right setup.
Placement, water flow, power, filtration, and drainage all matter. A good setup should feel clean, safe, and easy to repeat.
Understand the Role of the Chiller
A chiller helps cool the water and maintain a more consistent temperature. In many systems, water moves between the tub and cooling unit through hoses, connectors, or an integrated circulation system.
This means the chiller is not just an extra device. It becomes part of the full cold plunge setup.
If the water flow is blocked, the filter is dirty, or the unit is placed poorly, the system may need to work harder. Before using it, understand how water moves through your specific model.
Give the Unit Room to Breathe
A chiller needs space around it.
Avoid placing it in a tight corner where airflow is blocked. Heat needs to move away from the unit. If the chiller sits in a hot, cramped, or poorly ventilated area, performance may drop over time.
Keep it on a stable surface. Make sure it is protected from standing water, heavy splashes, and anything that could block the vents.
The setup should look calm, but it also needs to function properly.
Check Power Before You Start
Electrical safety should come before the first session.
Use the correct outlet for your system and avoid loose cables across wet walking areas. Power points should be placed away from puddles, drainage paths, and areas where water may splash.
If you are unsure whether the outlet is suitable, ask an electrician before plugging anything in. Cold plunge equipment sits close to water, so improvising is not worth the risk.
Keep Water Flow Clear
Water flow is central to chiller performance.
Hoses or connectors should be attached firmly and without sharp bends. Check for kinks, loose fittings, weak circulation, or leaks before using the tub fully.
Filtration also supports flow. Icetubs filters attach to the water inlet and capture particles as small as 5 microns, while still being simple to replace when maintenance is needed.
A cleaner filter helps the system move water more easily.
Fill the Tub Before Running the System
Do not run the chiller before the tub has enough water.
The pump and cooling system need proper water flow to work safely. Fill the tub to the recommended level, check the intake and outlet areas, and make sure any filter or connector is in place.
Running equipment without enough water can damage components.
A few minutes of checking can prevent a much bigger issue later.
Plan for Drainage and Cleaning
A chiller setup is easier to manage when drainage has been planned from the beginning.
Think about where water will go during changes, cleaning, or small spills. Indoors, this may mean a nearby drain or hose route. Outdoors, it may mean directing water away from electrical points, walls, and surfaces that should stay dry.
The easier it is to drain and clean, the easier it is to keep the routine going.
Test Before the First Full Session
Before your first real plunge, let the system run and observe it.
Check temperature changes, water flow, hose connections, filter area, noise, drainage route, and the floor around the unit. Make sure the area stays dry where it needs to stay dry.
The first test is not just about cooling the water. It is about learning how the whole setup behaves.
For a wider installation checklist, continue with Cold Plunge Tub Setup & Installation: Complete Guide.